Pedalboard Lessons
07 Aug 2024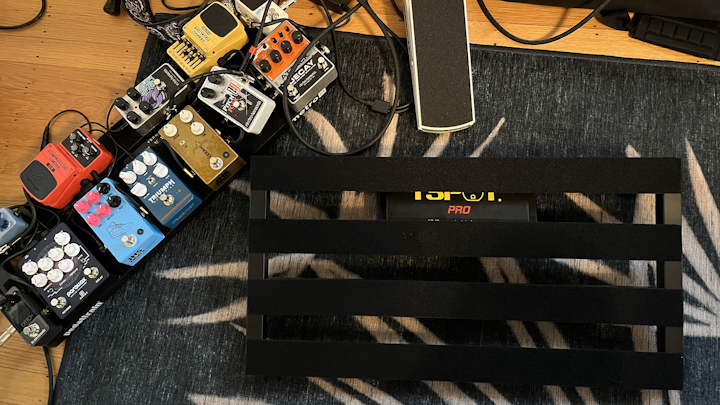
After creating my first pedalboard and living it with it for a while, I had some lessons:
- Rail height. The 3 rails of the Metro 24 is an awkward height. Most pedals are 2 rails worth of height, a wah or volume pedal is 3 rails high, but those are less central to me and I don’t mind having those off the board. There are pedal switchers that are 1 rail height, but if you only have 1 row of pedals I’m not sure those are needed. So if you’re just doing regular sized pedals on a 3 rail system you’re going to end up with sideways pedals to use the whole space. I wanted to increase to 4 rails so I could get 2 parallel rows of regular sized pedals.
- Power supply fit. The flat Metro 24 did technically fit my power supply underneath, but it was a tight fit that meant that the power connectors had to all be right angles to fit at all, which for the cords that came with it meant the pedals had to take the straight connectors which created other fit issues. Better off planning of a matching power supply to solve this.
- Number of power outputs. The power supply had 8 outputs, which seems generous but I was able to fit more pedals than that on the board. So I ended up daisy chaining off some of those isolated outputs. And with that I started to introduce noise issues.
- Tuner staging. The volume pedal had an output for a tuner, which allowed me to use the volume pedal to mute while tuning. I like that better than using the foot switch on the tuner itself. However with the volume pedal off the board this introduced another cable that had to be managed when packing/unpacking the board. Not worth it.
- Combo pedals. Due to the strain I was putting on the number of pedals and density of cables, I started to see the value in combo pedals (e.g. reverb and delay in one). These combo pedals can cut down on overall complexity
- Patch cables. Flat patch cables are a must. The Livewire ones I picked up at Guitar Center were too bulky and stiff, making it hard to get a nice tight board. I’m not really interested in cutting/soldering my own, especially as I’ve been experimenting rapidly, so I needed storebought fixed length cables. The MXR cables were okay… still a bit bulky. The best I found were the EBS Premium Gold Flat (flat and flexible). But I filled out the board mostly with Rock Stock cables that gave me a variety of lengths for a reasonable price.
- Velcro. The original video I referenced to build my board recommending using minimal velcro to attach pedals. Maybe that’s okay if you’re going to leave your board in one configuration, but I was experimenting and moving things around. For my next board, velcro all the way across.
It was time to build my second board. After more research I landed on two essential choices:
- Board: Pedaltrain Classic 2
- Power: Truetone CS12
Another key lesson was planning for the power draw from each pedal to make sure I knew which output to use for each and where I could afford to daisy chain. Thankfully there’s a website to help with that, and I was able to build a table to help plan for my next board:
| Brand | Model | Power (mA) |
|---|---|---|
| Behringer | EQ | 8 |
| Behringer | Compressor | 30 |
| EHX | Attack Decay | 140 |
| EHX | PitchFork | 25 |
| EHX | Small Stone | 12 |
| EHX | Q-tron | 10 |
| JHS | PG-14 | 67 |
| JHS | Tidewater | 3 |
| JHS | Morning glory | 43 |
| Keeley | Parallax | 75 |
| TC Electronics | Ditto+ | 100 |
| TC Electronics | Polytune3 | 44 |
| Wampler | Triumph | 21 |
| BOSS | DS-1 | 4 |
| BOSS | RC-10R | 250 |
Next up, I’ll cover the pedals and signal chain on the new board.